Plugins are the backbone of WordPress sites. Whether you want to add a contact form or an eCommerce store, plugins are always there to lend a helping hand.
But despite the essential role they play, plugins are also one of the places on your WordPress site that are most likely to go “wrong”.
Because plugins are made by independent third-parties, they can open the doors to all kinds of security and compatibility issues.
That’s why there are some plugin best practices you need to follow when you’re running a WordPress site.
These best practices span tips for how to choose plugins, how to analyze their performance, and how to properly maintain them once they’re a part of your site.
No matter what type of site you’re working on, here are the best practices you should follow when working with WordPress plugins…
How To Pick The Right Plugins To Install
The WordPress core team has made it incredibly simple to install plugins nowadays…which is a double-edged sword because it means that you can install new plugins without a second thought.
Don’t do that – put some effort into only using quality plugins on your site.
Some of the tips in this section might seem a little basic, but I think they’re important to cover nevertheless.
1. Consult The Wisdom Of The Crowds
While popularity doesn’t always mean quality, it is a good starting point in your quest for a plugin.
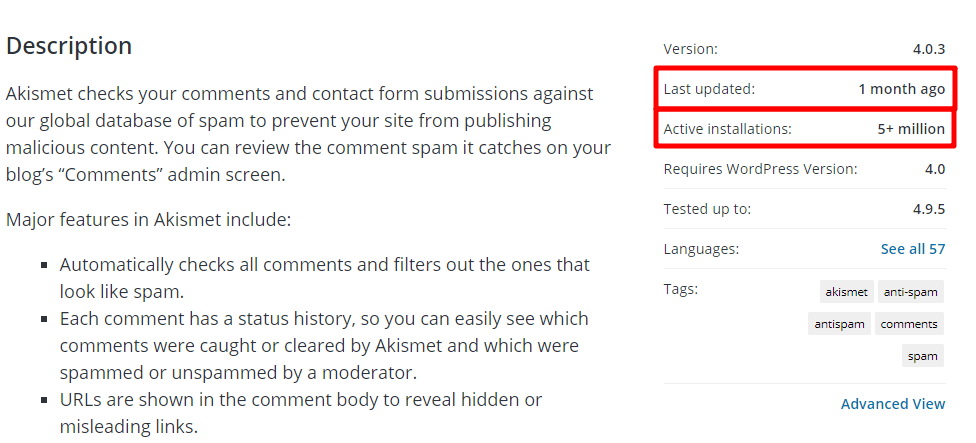
That is if you’re staring at one plugin that’s been downloaded 500,000 times and another that’s only been downloaded 3,000 times, the former plugin is probably going to be the better option more often than not.
WordPress.org shows this information in the right-hand sidebar:
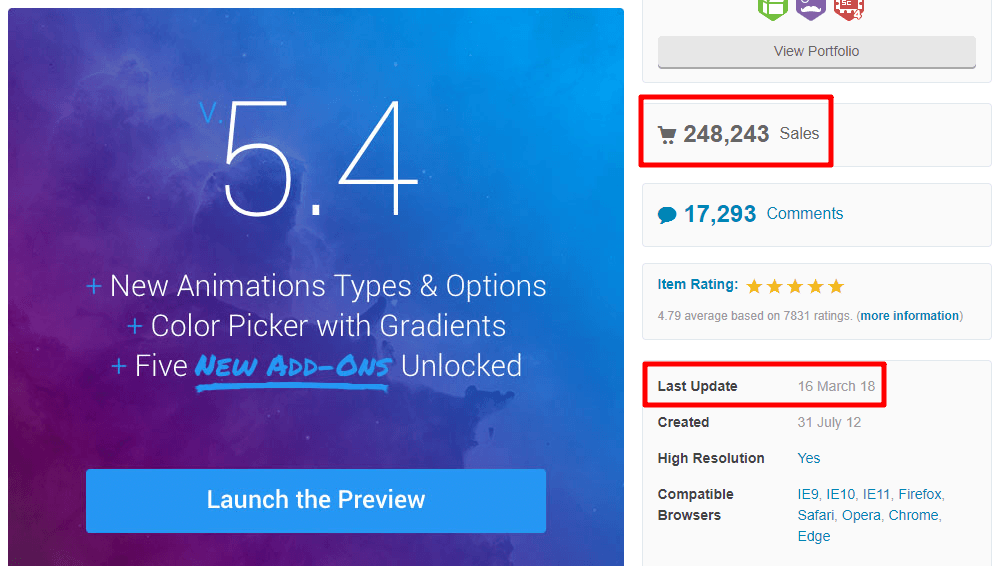
And Envato also publicizes sales numbers in its sidebar:
2. Check The Last Update Date
This is another one that’s a good general guideline, but not an absolute rule.
Most of the time, you want to see that a plugin is still receiving regular updates to ensure it’s compatible with the latest version of WordPress. That doesn’t mean a plugin that hasn’t been updated is always bad – sometimes a plugin “just works” and doesn’t need updates.
But unless you have the knowledge to actually look at the code yourself, it’s hard to know whether or not that applies to your chosen plugin.
So, when in doubt, seeing a recent update date is important.
Again, both WordPress.org and Envato show this information in the sidebar (marked above).
3. See What The Reviews Say
For every savvy copywriter crafting copy that makes you want to install the plugin right away, there’s a reviewer willing to tell you all that plugin’s potential flaws.
Consult those reviewers before you pick a plugin.
Again, both WordPress.org and Envato make it easy to access third-party reviews.
4. Gauge How Responsive The Developer Is To Issues
Beyond the reviews, another good way to gauge a plugin’s quality (at least on WordPress.org) is to look at the support forum.
It’s a good sign to see that the developer is actively resolving support requests:
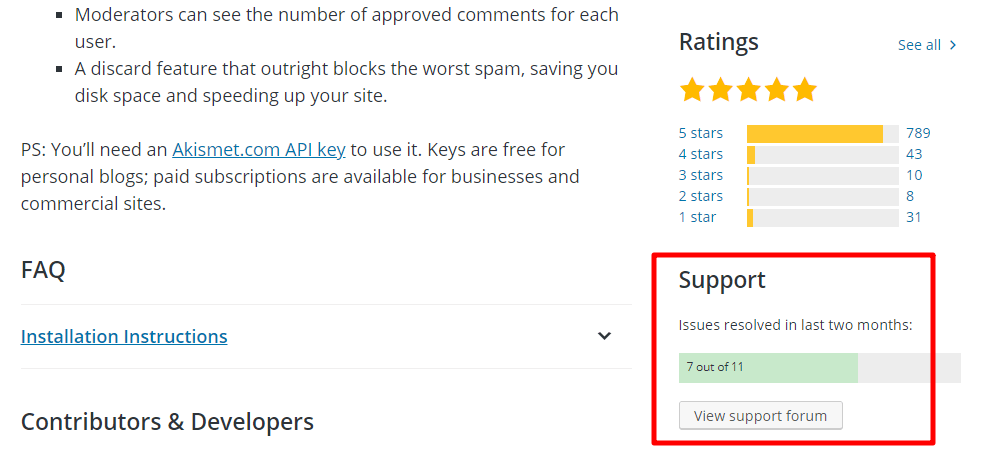
One thing to note, though, is that some developers only handle support requests on their own website. So check to see whether that’s the case before you ding them for unresponsive support.
5. Don’t Use Nulled Plugins
If you’ve ever searched for a premium plugin in Google, you may have noticed that Google’s autosuggest feature almost always suggests “plugin_name nulled” as a query:
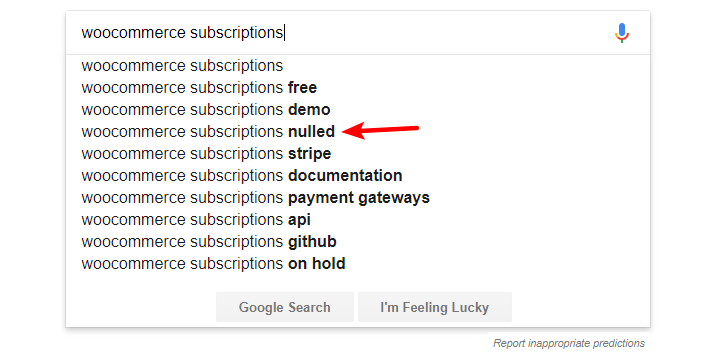
That means there are a lot of people looking for nulled themes and plugins…
In case you’re on the fence, nulled plugins are a horrible idea. Unlike their legal (but ethically debatable) cousins, GPL Clubs, nulled plugins are rife with malware and other vulnerabilities.
That means what you think is a way to save money is actually going to cost you down the road. Just don’t do it – there are plenty of quality free alternatives to most plugins.
6. Use A Sandbox Tool To Test Plugins
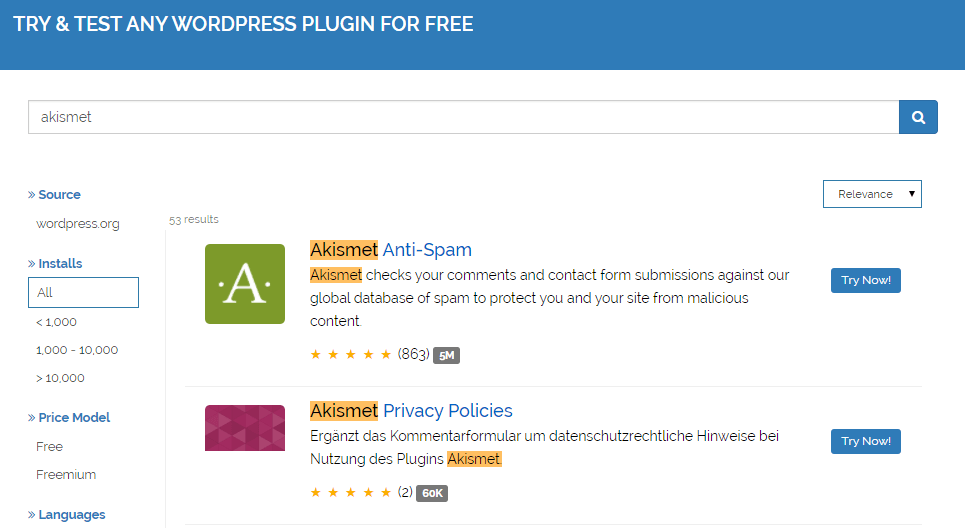
Found a plugin that checks all the boxes above? Before you install it on your live (or staging) site, you can give it a quick test run in a sandbox thanks to tools like the oddly-named, but highly effective, Poopy.life.
Poopy.life lets you create a blank sandbox where you’ll need to manually install the plugin yourself:
How To Pick The Proper Number Of Plugins (Or Why There Isn’t One)
Once you know how to pick quality plugins, let’s dig into the next question:
How many plugins should you use?
Contrary to the oft-repeated advice, too many plugins will not slow down your site.
But too many plugins that slow down your site will…slow down your site.
What I mean by that is that there’s no direct relationship between the number of plugins that you have installed and your site’s speed.
Some plugins will have essentially zero effect on your site’s speed, while others might cause a noticeable slow-down. You could have one hundred of the former with no issue, but one of the latter is bad for business.
In a recent survey we ran with WordPress users ranging from specialty dev agencies and bloggers to enterprise tech leads and CEOs we found that 44% of users have 1-5 plugins installed, where 30% of users have 6-10 plugins installed, and 22% have over 10 plugins installed. The rest claimed to have none.
So how do you figure out which plugins are slowing down your site? Here are two tips:
7. Use The P3 (Plugin Performance Profiler) Plugin
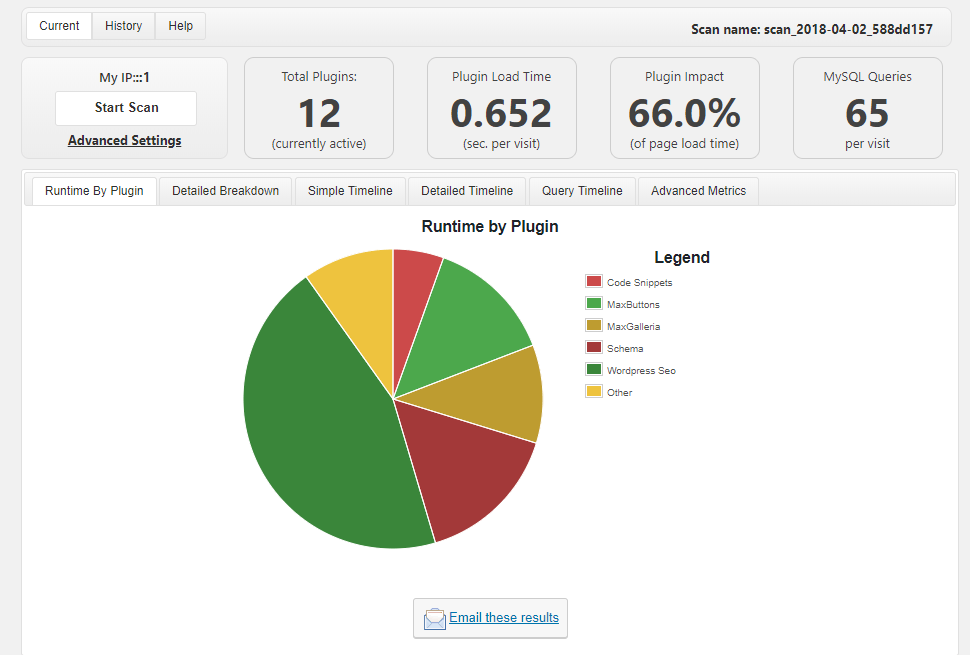
This one is a good example of how a plugin that hasn’t been updated in a while can still work great. While P3 (Plugin Performance Profiler) hasn’t been updated in three years now, the plugin still performs its function admirably (at least in my experience – some reviewers do cite issues with detecting plugins).
All you do is run the test. Then, P3 (Plugin Performance Profiler) will give you a beginner-friendly look at how your plugins impact your site’s performance, as well as how individual plugins perform:
8. Go To The Waterfall (Use GTmetrix)
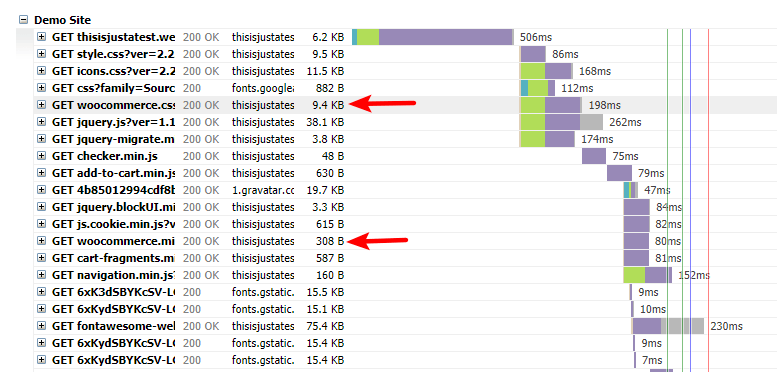
Another way to catch slow-loading plugins is to look at the Waterfall tab in tools like GTmetrix or Pingdom.
While the information isn’t quite as detailed and requires more technical savvy to interpret, you can single out plugins that are slowing down your site with slow requests.
Just run the performance test as usual. Then, look at the Waterfall analysis chart and hover over lengthy requests to see if any plugins are slowing things down.
I’ve pointed out a couple of the most obvious WooCommerce requests below so you can see how it generally works:
How To Safely Update Your Plugins To Keep Things Functioning
If you want to keep your WordPress site secure, keeping your plugins updated is an absolute necessity.
In a survey from Wordfence, plugins accounted for 55.9% of the hacked sites where the respondent knew how the hacker gained entry. Similarly, Sucuri found that three un-updated plugins accounted for a massive percentage of hacks.
Suffice it to say, you need to keep your plugins updated. Here’s how to do it safely:
9. Read The Changelog To Check For Any Likely Issues
A lot of people don’t know that this feature exists, but it’s super helpful for sussing out potential issues with a new plugin update.
Whenever you see the update prompt in your WordPress dashboard, you can click the View version X details link to see a changelog for the latest update:
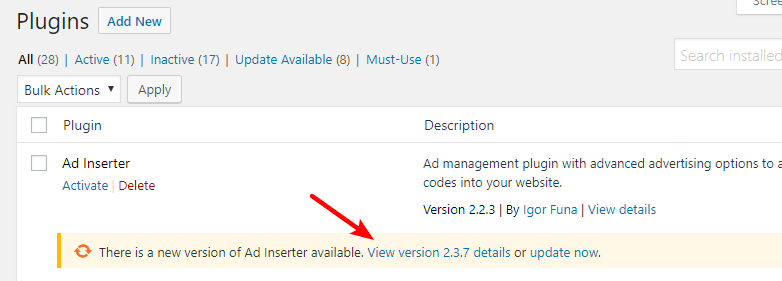
While the depth of this changelog is up to the developer, it can help you pinpoint specific areas to test after you update the plugin. Speaking of…
10. Use A Staging Site To Check For Compatibility Issues
A staging site is an awesome tool for testing plugin updates before you push them to your live site.
Combined with the information from the changelog, you can quickly run through the relevant functionality on your staging site to make sure there aren’t any issues.
Then, once you’ve given everything a test, you can safely update the plugin on your live site.
The easiest way to get access to a staging site is to choose a managed WordPress host that offers that feature. But if that’s not an option, the WP Staging plugin provides a slick, host-independent implementation.
What To Do With Plugins You No Longer Want
Just like ~50% of marriages end in divorce, there will come a time when you decide to break up with one of your plugins. To make a clean break, here are two more best practices to round out this post.
11. Don’t Leave Unused Plugins On Your Server
This one is simple:
If you’re not actively using a plugin (and have no plans to use it in the future), delete it.
Here’s why:
Even when a plugin is deactivated, all that code is still sitting on your server.
Many malicious attacks target specific PHP files that are included with a plugin. So even if you’ve deactivated the plugin, those attacks could still access the PHP files (Mark Maunder from Wordfence discusses this here).
So if it’s not being used – get rid of it.
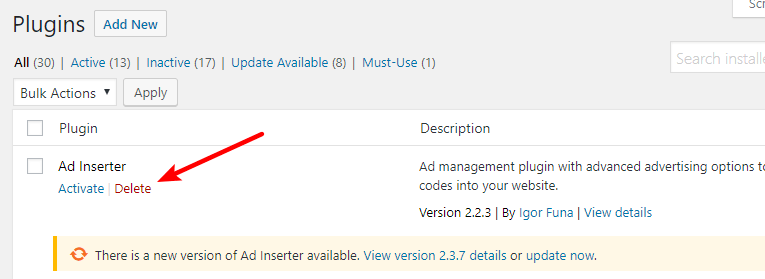
All you need to do is hit the Delete button in your WordPress dashboard and that should get rid of all of the plugins files. But…
12. Remove Left-Behind Database Tables, Too
…sometimes hitting that Delete button isn’t going to remove all traces of a plugin from your server.
Often, plugins will leave behind gunk that clutters up your database.
While you can manually remove these tables if you’re comfortable working with phpMyAdmin, a more user-friendly approach is to use the premium version of the Advanced Database Cleaner plugin. Specifically, you’re looking at the categories that relate to Orphan options or Orphan tables.
Final Thoughts On WordPress Plugin Best Practices
Following these WordPress plugin best practices isn’t especially difficult or technical, but it can have a major effect on the stability and functioning of your site going forward.
If you:
- Properly vet and test plugins before installing them
- Analyze how plugins affect your page load times after installing them
- Safely (and quickly) update your plugins
- Properly delete unused plugins
Then you’re setting your WordPress site up for success both now and in the future.
Interesting stuff. Are here any ways to test the integrity of a plugin? I inherited a website and there are a number of plugins that seem nulled (they don’t show when updates are available). How can I know? Can I find out if they’re corrupted in some way?